The world of cold coffee extraction represents a fascinating intersection of chemistry, patience, and culinary artistry. Unlike traditional hot brewing methods that utilize high temperatures to rapidly dissolve coffee solubles, cold extraction relies on time. By replacing heat with extended contact time, the resulting beverage is profoundly different—boasting a naturally sweeter flavor profile, significantly lower acidity, and a smooth, full-bodied mouthfeel that hot brewing simply cannot replicate. This comprehensive guide synthesizes the ultimate methodologies for both cold brew and cold drip coffee, providing you with the definitive blueprint for home brewing perfection.
Understanding the Cold Extraction Methods: Cold Brew vs. Cold Drip
While often used interchangeably in casual conversation, cold brew and cold drip refer to two entirely distinct extraction mechanisms: immersion and percolation. Understanding the fundamental mechanics behind each method is the first critical step toward mastering cold coffee preparation. Both methods bypass the extraction of bitter tannins and highly acidic compounds that are typically released at temperatures above 195 degrees Fahrenheit, but they achieve this through different physical processes.
The Mechanics of Immersion (Cold Brew)
Cold brew is the quintessential immersion method. In this process, coarsely ground coffee is fully submerged in cold or room-temperature water for an extended period, typically ranging from 12 to 24 hours. The extraction happens through osmosis, where the water slowly penetrates the cellular structure of the coffee grounds, dissolving the flavor compounds and oils over time. Because the entire dose of coffee is in constant contact with the entire volume of water, the extraction is uniform but slow, resulting in a heavy, syrupy body and a highly concentrated, chocolatey flavor profile.
The Mechanics of Percolation (Cold Drip)
Conversely, cold drip (often referred to as Kyoto-style or Dutch coffee) utilizes the percolation method. This visually stunning technique involves a specialized tower apparatus where ice water slowly drips over a bed of coffee grounds. As each drop of water passes through the grounds, it extracts flavor compounds before dripping into a collection carafe below. Because fresh water is constantly being introduced to the coffee bed, the extraction is highly efficient. This method typically takes between 3 to 12 hours and yields a beverage that is lighter in body, remarkably clean, and incredibly expressive of the coffee’s origin characteristics, highlighting delicate floral and fruity notes.
| Characteristic | Cold Brew (Immersion) | Cold Drip (Percolation) |
|---|---|---|
| Extraction Time | 12 – 24 Hours | 3 – 12 Hours |
| Flavor Profile | Deep, chocolatey, low acidity, heavy body | Bright, complex, wine-like, clean body |
| Equipment Needed | Simple jar or French press | Specialized cold drip tower |
| Grind Size | Extra Coarse | Medium-Coarse |

The Perfect Cold Brew Coffee Recipe and Golden Ratios
Achieving the perfect cold brew at home is entirely dependent on respecting the mathematical relationship between coffee, water, and time. Because you are essentially creating a highly caffeinated extract, dialing in the correct ratio is paramount. The beauty of cold brew lies in its versatility; by adjusting your initial brewing ratio, you can create either a potent concentrate meant for dilution or a ready-to-drink beverage straight from the fridge.
Demystifying the Water-to-Coffee Ratio
The golden rule of cold brew revolves around weight, not volume. Using a digital kitchen scale is non-negotiable for consistent results. Depending on your desired final product, you must choose your ratio carefully. A concentrate allows for space-saving storage and versatile serving options, while a ready-to-drink ratio simplifies the pouring process.
- The Concentrate Ratio (1:4 to 1:5): This ratio uses one part coffee to four or five parts water (e.g., 100g of coffee to 400g of water). This yields a thick, potent syrup that must be diluted with water or milk before consumption, typically at a 1:1 or 1:2 ratio in the glass.
- The Standard Strong Ratio (1:8): Utilizing one part coffee to eight parts water produces a robust brew that can be served directly over a large ice cube, which will provide the perfect amount of slow dilution as you drink.
- The Ready-to-Drink Ratio (1:15): For those who prefer to pour and go, one part coffee to fifteen parts water mirrors the strength of standard hot drip coffee. No dilution is necessary.
Choosing the Right Grind Size and Roast
The physical size of your coffee particles dictates the rate of extraction. For immersion cold brewing, an extra-coarse grind—resembling the size of coarse sea salt or raw sugar—is absolutely essential. If the grind is too fine, the massive surface area will lead to over-extraction, pulling out bitter, astringent flavors over the 24-hour steeping period. Furthermore, finely ground coffee creates a muddy sludge that is nearly impossible to filter out completely. Regarding roast profile, medium to dark roasts are traditionally favored for cold brew, as their inherent chocolate, caramel, and nutty notes are beautifully amplified by the cold extraction process.
Step-by-Step Immersion Process
Executing the cold brew process requires meticulous attention to detail during the preparation phase to ensure an even extraction. Follow these definitive steps for a no-failure batch:
- Step 1: Weigh and Grind: Weigh out your desired amount of fresh coffee beans and grind them on the coarsest setting available on your burr grinder.
- Step 2: The Initial Wetting: Place the grounds into your brewing vessel (a large mason jar or dedicated cold brewer). Pour a small amount of filtered, room-temperature water over the grounds and gently stir to ensure every particle is saturated. This prevents dry pockets from forming.
- Step 3: The Main Pour: Add the remaining volume of water according to your chosen ratio. Give the mixture one final, gentle stir.
- Step 4: The Steep: Cover the vessel. You can steep at room temperature for 12 to 16 hours, or in the refrigerator for 18 to 24 hours. The colder temperature of the fridge slows extraction, requiring more time but yielding a slightly crisper finish.
- Step 5: The Filtration: This is the most crucial step for a clean mouthfeel. Pour the mixture through a fine-mesh sieve lined with a paper coffee filter or cheesecloth. Do not squeeze or press the grounds, as this forces bitter fines into your clean brew. Let gravity do the work.

Mastering the Cold Drip Coffee Technique
If cold brew is the blunt instrument of cold extraction, cold drip is the scalpel. This method requires specialized equipment and a precise understanding of flow dynamics. The resulting cup is a revelation—translucent, aromatic, and retaining the delicate acidity and fruit notes that are often muted in standard immersion cold brew.
Essential Equipment for Cold Drip
To execute this method, you need a cold drip tower. This apparatus consists of three distinct vertical chambers. The top chamber acts as the reservoir for ice and water. Below that sits the adjustable drip valve, which is the mechanical heart of the system. The middle chamber is a glass cylinder that holds the coffee grounds, featuring a sintered glass or ceramic filter at its base. Finally, the bottom carafe collects the finished elixir. You will also need circular paper filters designed to sit on top of the coffee bed.
Setting the Perfect Drip Rate
The rate at which water falls onto the coffee bed is the primary variable you must control. The industry standard starting point is exactly one drip per second (60 drips per minute). If the drip rate is too fast, the water will channel through the coffee bed without extracting sufficient flavor, resulting in a weak, sour beverage. If the drip rate is too slow, the water will stagnate in the middle chamber, leading to over-extraction and a harsh, astringent finish. It is vital to monitor the valve periodically, as the decreasing water pressure in the top chamber (as it empties) will naturally slow the drip rate over time.
The Extraction Timeline and Flavor Profile
The cold drip process is a delicate balancing act of preparation and timing. Here is the operational breakdown:
- Grind Preparation: Unlike the extra-coarse grind of immersion brewing, cold drip requires a medium-coarse grind—similar to what you would use for a Chemex or standard pour-over. This finer grind provides enough resistance to slow the water’s descent.
- The Pre-Wetting Phase: Before beginning the drip, you must manually wet the coffee bed with a small amount of water. Stir it gently to create a uniform, damp mass. This prevents the initial drips of water from carving isolated channels through dry coffee.
- Filter Placement: Place a circular paper filter directly on top of the damp coffee bed. This is a non-negotiable step. The paper filter acts as a dispersion screen, catching the single drops of water and spreading the moisture evenly across the entire surface of the coffee.
- The Drip Cycle: Fill the top chamber with a mixture of ice and cold filtered water. Set the valve to one drip per second. The entire process will take between 3 to 6 hours depending on the volume. The final beverage will possess a vibrant clarity, making it ideal for highlighting high-quality, single-origin African coffees known for their berry and citrus notes.

Advanced Troubleshooting and Storage Protocols
Even with the best recipes, variables in water chemistry, bean age, and ambient temperature can occasionally throw your extraction off balance. Understanding how to diagnose and correct flavor defects is what separates an amateur from a master home barista. Furthermore, proper storage is essential to maintain the integrity of your painstaking work.
Avoiding Bitter or Sour Brews
If your cold brew or cold drip tastes unpleasantly bitter, woody, or astringent, you have experienced over-extraction. In an immersion setup, this means your grind was too fine or your steeping time was too long. To fix this in your next batch, coarsen the grind significantly or reduce the steep time by 4 hours. In a cold drip setup, bitterness indicates the drip rate was too slow, causing water to pool. Conversely, if your coffee tastes sour, salty, or hollow, it is under-extracted. You must either grind finer to increase surface area, extend the steeping time, or increase the drip rate slightly to ensure proper saturation.
Maximizing Shelf Life and Freshness
One of the greatest advantages of cold extracted coffee is its stability. Because the volatile oils and acids were never exposed to heat, they do not degrade and oxidize as rapidly as hot coffee. However, oxygen is still the enemy. Store your finished cold brew or cold drip in a sterilized, airtight glass container in the refrigerator. A properly sealed cold brew concentrate will maintain its peak flavor profile for up to 10 to 14 days. If you notice the flavor becoming flat or developing a stale, cardboard-like aroma, it has oxidized and should be discarded.

Creative Serving Suggestions for Cold Extracted Coffee
Once you have secured a perfect batch of cold extracted coffee, the presentation and serving methodology can elevate the experience further. Cold coffee is an incredibly versatile ingredient that serves as a brilliant canvas for mixology, dairy pairings, and textural innovations.
Dilution and Dairy Pairings
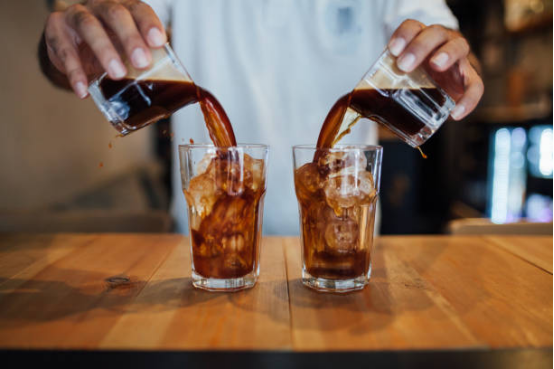
If you have brewed a concentrate, the standard serving method is to cut it with equal parts water or milk. For a richer texture, oat milk and macadamia milk pair exceptionally well with the chocolatey notes of immersion cold brew. Always add your ice to the glass first, followed by the dairy or water, and finally pour the coffee concentrate over the top to create a beautiful cascading visual effect before stirring.
Textural Innovations: The Nitro Hack
If you crave the creamy, Guinness-like texture of a cafe nitro cold brew but lack a keg system, you can mimic the effect at home using a standard whipped cream dispenser. Pour your diluted, ready-to-drink cold brew into the canister, charge it with a single nitrous oxide (N2O) cartridge, shake vigorously for ten seconds, and dispense straight into a glass. The gas infuses into the liquid, creating a cascading micro-foam head that dramatically enhances the perceived sweetness and mouthfeel of the coffee without adding a single calorie or gram of sugar.
Frequently Asked Questions (FAQ)
- Can I use regular pre-ground coffee from the grocery store for cold brew?
- While it is physically possible, it is highly discouraged. Standard pre-ground coffee is typically ground to a medium-fine consistency meant for standard drip machines. Using this in an immersion cold brew will almost certainly result in over-extraction, yielding a harsh, bitter flavor, and it will be exceedingly difficult to filter out the fine sediment, leaving you with a gritty cup.
- Should I steep my cold brew in the refrigerator or on the kitchen counter?
- Both methods are valid but produce slightly different results. Steeping at room temperature (around 70°F) speeds up the extraction, requiring only 12-16 hours, and tends to pull out more bold, robust flavors. Steeping in the refrigerator (around 38°F) slows the chemical reaction, requiring 18-24 hours, but often results in a smoother, sweeter, and more delicate flavor profile.
- Why does my cold drip coffee taste weak and watery?
- A weak cold drip is usually the result of water channeling. This happens if the coffee bed wasn’t pre-wetted, if the paper filter wasn’t placed on top to disperse the water, or if the drip rate was set too fast. Ensure you are using a medium-coarse grind, tamping it very lightly to ensure an even bed, and maintaining a strict one-drip-per-second rate.
- Can I heat up cold brew if I want a hot cup of coffee?
- Absolutely. Because the cold brewing process leaves behind the bitter, astringent compounds, heating up cold brew concentrate (diluted with hot water) produces an incredibly smooth, low-acid hot coffee. Simply mix your concentrate with boiling water to your preferred strength, or gently warm the mixture on the stove. Avoid boiling the actual coffee, as this can negatively alter the flavor.
- What is the best type of coffee bean to use for cold extraction?
- For immersion cold brew, medium to dark roasts from Central and South America (like Colombia or Brazil) are ideal, as their natural chocolate, nut, and caramel flavors shine through the heavy body. For cold drip, light to medium roasts from African regions (like Ethiopia or Kenya) are preferred, as the percolation method beautifully highlights their bright, floral, and fruity characteristics.