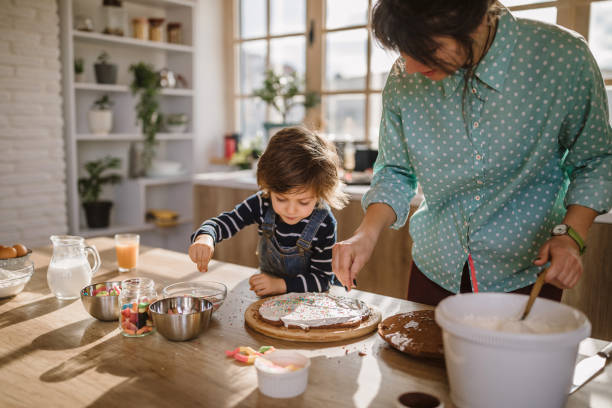
Baking is far more than a culinary task; it is a multi-dimensional journey that encompasses creative expression, technical precision, and emotional connection. From the chaotic joy of a family kitchen to the meticulous setup of a professional-grade food photograph, the world of cake artistry offers endless opportunities for growth and enjoyment. This guide serves as a foundational pillar for anyone looking to elevate their home baking experience, combining practical instructions with deep dives into the “why” behind every technique.
Creating Family Memories through Collaborative Baking
Transforming the kitchen into a classroom and a playground allows families to bond in ways that few other activities can match. Baking requires cooperation, communication, and a shared vision, making it the perfect medium for building lasting relationships. When children are involved, the process becomes a sensory-rich environment that aids in their cognitive and motor development.
Age-Appropriate Roles for Junior Bakers
To ensure a successful and stress-free family baking session, it is vital to assign tasks that match the developmental stage of each participant. For toddlers, the focus should be on sensory exploration, such as touching the flour or stirring under close supervision. Older children can take on more responsibility, such as measuring dry ingredients, which reinforces mathematical concepts like fractions and volume.
- Ages 3-5: Stirring batter, greasing pans with a brush, and choosing decorative sprinkles.
- Ages 6-9: Cracking eggs, measuring ingredients, and using a hand mixer with assistance.
- Ages 10+: Reading recipes independently, separating egg whites, and mastering basic piping techniques.
The Psychology of Creative Bonding
Baking together fosters a sense of “collective efficacy”—the shared belief in a group’s ability to achieve a goal. When a family successfully produces a cake, it reinforces the value of teamwork. Furthermore, the kitchen environment encourages open dialogue, providing a safe space for children to express their creativity through flavor choices and decorative themes.

Mastering the Technique of Multi-Tier Cake Service
The arrival of a multi-tier cake signifies a grand occasion, but the prospect of cutting it can be daunting for many. Understanding the internal architecture of these cakes is the first step toward professional-level service. Multi-tier cakes are not merely stacked; they are engineered with support systems that must be navigated carefully to maintain the cake’s aesthetic and structural integrity.
Understanding Internal Support Systems
Most tiered cakes utilize a system of dowels (either wood or food-grade plastic) and cake boards. Each tier usually sits on its own thin cardboard base, which is then supported by the dowels embedded in the tier below. Recognizing this structure prevents the common mistake of trying to cut through the entire height of the cake at once, which would result in a collapsed mess.
The Step-by-Step Cutting Process
To serve a multi-tier cake with grace, follow this systematic approach used by professional event caterers:
- Step 1: The Top Tier Removal. If the top tier is meant to be saved (a common tradition at weddings), carefully lift it off its support dowels and place it on a separate plate.
- Step 2: Removing the Dowels. Once a tier is exposed, remove the support dowels from the tier you are about to cut.
- Step 3: Concentric Circle Cutting. For large round tiers, do not cut wedges from the center. Instead, cut a circle about 2 inches in from the edge. Slice the outer ring into pieces, then move to the inner circle. This maximizes the number of even servings.

Professional Cake Photography for Home Bakers
In the digital age, the enjoyment of a cake begins long before the first bite; it starts with the visual feast shared on social media. Capturing the texture of a sponge or the gloss of a ganache requires more than just a high-end camera; it requires an understanding of light, composition, and styling.
The Power of Natural Light
The most important element in food photography is lighting. Avoid using a built-in camera flash, which creates harsh highlights and flat shadows. Instead, position your cake near a large window. North-facing windows provide the most consistent, soft light throughout the day. If the light is too bright, use a sheer white curtain to diffuse it, creating that professional “glow.”
Composition and the Rule of Thirds
To create a dynamic image, avoid placing the cake directly in the center of the frame every time. Use the “Rule of Thirds” by imagining a 3×3 grid over your viewfinder. Place the focal point of the cake—perhaps a specific decorative flower or a drip of frosting—along one of the grid lines or at their intersections. This creates a more balanced and engaging photograph.
| Photography Angle | Best Use Case | Visual Impact |
|---|---|---|
| 45-Degree Angle | General cake shots | Shows both the top and the side profile. |
| Overhead (Flat Lay) | Tablescapes and patterns | Emphasizes geometry and decorative toppings. |
| Macro (Close-up) | Texture and detail | Highlights the crumb of the cake or intricate piping. |

Instant Gratification: The Science of the 2-Minute Mug Cake
Sometimes the craving for cake strikes when time is a luxury we don’t have. The 2-minute chocolate mug cake is a marvel of modern culinary science, utilizing the rapid moisture-vibrating capabilities of a microwave to “bake” a sponge in seconds. However, achieving a light, airy texture rather than a rubbery one requires strict adherence to ingredient ratios.
The Essential Ratio for Microwave Success
The key to a successful mug cake is the balance between moisture and structure. Because the microwave cooks from the inside out and evaporates moisture rapidly, the addition of a small amount of oil or melted butter is non-negotiable for a tender crumb. A standard “golden ratio” includes 4 tablespoons of flour, 2 tablespoons of cocoa powder, 2 tablespoons of sugar, and 3 tablespoons of milk combined with 1 tablespoon of oil.
Customizing Your Instant Dessert
Once you master the base recipe, the possibilities for customization are endless. To create a “lava” effect, push a square of dark chocolate or a teaspoon of peanut butter into the center of the batter before cooking. The microwave will melt the center while the exterior sets, creating a decadent molten core.

Essential Tools for Every Home Cake Artist
While a skilled baker can work wonders with basic utensils, specific tools can significantly reduce the difficulty of complex tasks. Investing in a few key pieces of equipment can bridge the gap between “homemade” and “professional.”
Must-Have Equipment for Precision
A rotating cake turntable is perhaps the most underrated tool for home bakers. It allows for a continuous motion when applying a crumb coat or final frosting layer, resulting in a perfectly smooth finish. Similarly, a bench scraper (or icing smoother) is essential for achieving those sharp, clean edges seen on professional bakery cakes.
- Offset Spatula: Allows for spreading frosting without your knuckles touching the cake surface.
- Digital Scale: Provides the precision required for consistent results, especially in sensitive recipes like sponge cakes.
- Serrated Bread Knife: The only tool that can cleanly level a cake or slice through delicate layers without compressing them.

Advanced Sharing and Presentation Etiquette
The final stage of the cake journey is the act of sharing. Presentation is the “wrapping paper” of the culinary world. How you present a cake—whether on a vintage pedestal or a modern slate board—sets the tone for the tasting experience. Sharing is not just about distribution; it is about the communal celebration of craft.
The Art of the Platter
When presenting a cake, consider the color contrast. A dark chocolate cake pops beautifully against a white or light blue ceramic plate. For a more rustic feel, a wooden board can complement a naked cake decorated with fresh berries. Always ensure the serving area is clean and that the cake is the undisputed star of the table.

Troubleshooting Common Baking and Styling Issues
Even the most experienced bakers encounter hurdles. Understanding how to fix common issues can save a project from disaster. For instance, if a cake is too dry, a simple syrup soak (equal parts sugar and water) can restore moisture and add flavor before frosting.
Fixing Photography and Visual Flaws
In photography, if your cake looks “yellow” or “muddy,” it is likely a white balance issue. Most smartphone editing apps allow you to adjust the “Temperature” or “Warmth.” Sliding it toward the blue side can neutralize unwanted yellow tones from indoor lighting, making the frosting look crisp and white.

Scaling Your Home Baking Hobby
For those who find themselves baking more frequently, scaling up involves moving from single-batch recipes to organized production. This requires better time management, such as “mise en place” (pre-measuring all ingredients) and understanding how to double or triple recipes without compromising the chemical leavening process.

Future Trends in Home Dessert Creation
The future of home baking is leaning toward “functional indulgence”—cakes that incorporate wellness-focused ingredients like almond flour, natural sweeteners, and botanical infusions. Additionally, the integration of technology, such as 3D-printed cake toppers and AR-enhanced recipe apps, is changing how we interact with our favorite desserts.
Frequently Asked Questions (FAQ)
- Q1: How do I prevent a multi-tier cake from leaning?
- The key is ensuring your base is perfectly level and your dowels are cut to the exact same height. Use a small spirit level on your cake board before stacking the next tier to ensure the foundation is stable.
- Q2: Can I make the 2-minute mug cake in a regular oven?
- While you can, it defeats the purpose of the “instant” recipe. A regular oven would take 15-20 minutes at 350°F (175°C). The mug cake recipe is specifically formulated for the rapid steam-based cooking of a microwave.
- Q3: What is the best time of day for cake photography?
- The “Golden Hour”—shortly after sunrise or before sunset—provides the softest, most flattering light. However, midday light near a window with a sheer curtain is often the most practical for capturing clear, bright details.
- Q4: How do I involve young children in baking without the mess?
- Embrace the mess as part of the learning process, but minimize it by using deep mixing bowls and laying out a silicone mat or parchment paper on the counter. Assigning them a specific “station” also helps contain the chaos.
- Q5: Why does my cake frosting look grainy in photos?
- This is often due to over-mixing the frosting, which incorporates too many air bubbles, or using powdered sugar that hasn’t been sifted. In photography, high-resolution cameras pick up these textures. Smoothing the frosting with a warm metal spatula can help create a camera-ready finish.