The Art of Homemade Summer Refreshments
There is an undeniable charm and satisfaction that comes with crafting your own beverages, especially when the sun is shining and the days are long. Homemade summer drinks offer a refreshing escape, a personal touch to gatherings, and an opportunity to experiment with vibrant flavors. Beyond the simple act of mixing, creating your own concoctions allows for unparalleled customization, ensuring every sip aligns perfectly with your taste preferences and dietary needs. This guide delves deep into the processes, ingredients, and techniques required to master three iconic summer beverages: the timeless fruity sangria, the invigorating mojito with an innovative twist, and the sophisticated delight of homemade strawberry and peach wine.
The Allure of DIY Beverages
The appeal of making drinks at home extends beyond mere convenience. It’s about control over ingredients, the joy of a creative process, and the ability to tailor sweetness, alcohol content, and flavor profiles precisely. Unlike store-bought options that often contain artificial additives and excessive sugars, homemade drinks emphasize fresh, natural components. This not only results in a superior taste but also offers a healthier alternative, allowing you to choose organic fruits, natural sweeteners, and high-quality spirits or non-alcoholic bases. The sensory experience begins long before the first sip, from selecting ripe fruits to muddling fragrant herbs, making the entire process a delightful journey.
Health & Customization Benefits
One of the most significant advantages of homemade drinks is the ability to precisely manage their nutritional content. You can drastically reduce added sugars by relying on the natural sweetness of fruits, or opt for alternative sweeteners like honey, agave, or stevia. For those with dietary restrictions or allergies, crafting beverages at home ensures that every ingredient is safe and suitable. Furthermore, the capacity to adjust alcohol levels, or even create completely non-alcoholic versions of classic cocktails, makes homemade drinks inclusive for all guests. This level of customization is simply unattainable with pre-made mixers or bottled options, empowering you to truly make each drink your own masterpiece.

Mastering the Classic Fruity Sangria
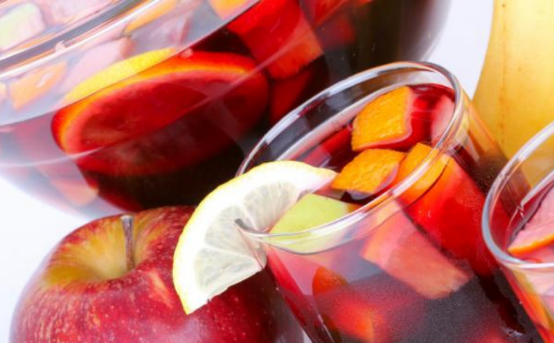
Sangria, a quintessential Spanish beverage, embodies the spirit of summer with its vibrant colors, refreshing fruitiness, and delightful wine base. Traditionally made with red wine, chopped fruit, a sweetener, and a touch of brandy or orange liqueur, sangria is incredibly versatile and can be adapted to various palates and seasons. The key to an exceptional sangria lies in the quality of its components and the time allowed for flavors to meld. This section will guide you through crafting a traditional fruity sangria, offering insights into ingredient selection and preparation techniques that elevate this beloved drink from good to extraordinary.
Essential Sangria Ingredients
The foundation of any great sangria begins with its ingredients. Choosing the right wine and fresh, ripe fruits is paramount. For a classic red sangria, a dry, young, and fruity red wine like a Garnacha (Grenache), Tempranillo, or Merlot is ideal. Avoid heavily oaked or tannic wines, as they can overpower the fruit. For white sangria, a crisp Pinot Grigio or Sauvignon Blanc works wonderfully. The fruit selection is where creativity truly shines. Common choices include:
- Citrus Fruits: Oranges, lemons, and limes provide essential acidity and zest.
- Stone Fruits: Peaches, nectarines, and plums add sweetness and a soft texture.
- Berries: Strawberries, raspberries, and blueberries infuse bright, juicy notes.
- Apples & Pears: Offer a subtle crunch and mellow sweetness.
Beyond wine and fruit, a good sweetener (sugar, simple syrup, or honey), a splash of brandy or orange liqueur (like Cointreau or Triple Sec), and sometimes a touch of sparkling water or soda for effervescence complete the ensemble. Always prioritize fresh, seasonal fruits for the best flavor and aroma.
Step-by-Step Sangria Preparation
Crafting sangria is a simple yet rewarding process that primarily involves chopping, mixing, and chilling. The magic happens during the maceration period, where the fruits infuse the wine with their essences. Follow these detailed steps for a perfect pitcher:
- Prepare the Fruit: Wash all fruits thoroughly. Slice oranges, lemons, and limes into thin rounds or wedges. Chop apples, peaches, and other larger fruits into bite-sized pieces. Berries can be left whole or halved if very large.
- Combine in a Pitcher: Place all the prepared fruit into a large pitcher or punch bowl. Add 1/4 to 1/2 cup of granulated sugar (adjust to desired sweetness and fruit ripeness).
- Muddle Gently (Optional but Recommended): Lightly muddle the fruit and sugar for about 30 seconds. This helps release the juices and flavors from the fruit, accelerating the infusion process.
- Add Wine and Spirits: Pour in one 750ml bottle of your chosen red or white wine. Add 1/4 cup of brandy or orange liqueur. Stir gently to combine all ingredients.
- Chill and Macerate: Cover the pitcher and refrigerate for at least 4 hours, or preferably overnight. This chilling period is crucial for the flavors to fully meld and deepen. The longer it chills, the more pronounced the fruit flavor will be.
- Serve: Before serving, taste and adjust sweetness if necessary. You can add a splash of sparkling water, club soda, or ginger ale for a fizzy finish, if desired. Serve over ice, ensuring each glass gets a generous portion of the fruit.
Sangria Variations & Serving Suggestions
The beauty of sangria lies in its adaptability. While the classic red is beloved, numerous variations can cater to different preferences:
- White Sangria: Use a crisp white wine and lighter fruits like peaches, green grapes, and melon. A splash of elderflower liqueur can add a floral note.
- Rosé Sangria: Perfect for a lighter, drier option, pairing well with berries and tropical fruits like pineapple and mango.
- Sparkling Sangria: For a celebratory touch, add sparkling wine or Prosecco just before serving. This creates a delightful effervescence.
- Non-Alcoholic Sangria: Replace wine with sparkling grape juice, cranberry juice, or a non-alcoholic red blend. Omit the brandy, or use a splash of non-alcoholic vanilla extract for depth.
When serving, consider garnishing each glass with a fresh mint sprig, an extra fruit slice, or a colorful cocktail pick. A large, clear pitcher allows the beautiful colors of the fruit and wine to shine through, making for an inviting presentation.

Crafting the Perfect Mojito: A Twist on Tradition
The Mojito, a vibrant cocktail hailing from Cuba, is synonymous with refreshment. Its classic combination of fresh mint, zesty lime, sugar, white rum, and sparkling soda water creates a symphony of flavors that is both invigorating and perfectly balanced. While the traditional recipe is a masterpiece in itself, the mojito also lends itself beautifully to creative interpretations. This section explores the fundamental elements of a classic mojito and then dives into exciting ways to introduce a “twist” that can surprise and delight your palate.
Anatomy of a Classic Mojito
Understanding the core components of a classic mojito is crucial before venturing into variations. Each element plays a vital role in achieving the drink’s signature profile:
- Fresh Mint: Spearmint is preferred for its bright, clean aroma. The key is to gently muddle, not pulverize, to release essential oils without bitterness.
- Lime Juice: Freshly squeezed lime juice provides the essential tartness and citrusy zing. Bottled lime juice simply doesn’t compare.
- Sugar: Granulated sugar or simple syrup balances the acidity of the lime and enhances the mint. Simple syrup dissolves more easily.
- White Rum: A light, crisp white rum is the spirit of choice, offering a clean base that allows other flavors to shine.
- Club Soda/Sparkling Water: Adds effervescence and lengthens the drink, making it supremely refreshing.
- Ice: Essential for chilling the drink and contributing to its refreshing quality.
The harmony of these ingredients is what makes a mojito an enduring favorite, offering a perfect blend of sweet, sour, herbal, and spirited notes.
The “Twist” Factor: Infusing New Flavors
While the classic mojito is perfect, introducing a “twist” can elevate the experience and cater to diverse preferences. The easiest way to innovate is by incorporating fresh fruits or flavored syrups. These additions can be muddled with the mint and lime, or added as a puree. Consider these popular and delicious twists:
- Strawberry Mojito: Muddle fresh strawberries with the mint and lime for a sweet and slightly tart berry infusion.
- Mango Mojito: Add ripe mango chunks or a tablespoon of mango puree to the muddling process for a tropical delight.
- Raspberry Mojito: Similar to strawberry, fresh raspberries add a vibrant color and tangy sweetness.
- Cucumber Mojito: Thin slices of cucumber muddled with mint create an incredibly refreshing, spa-like drink.
- Pineapple Mojito: Pineapple juice or muddled pineapple chunks introduce a sweet and tangy tropical dimension.
- Ginger Mojito: A small slice of fresh ginger, muddled, or a splash of ginger syrup can add a warming, spicy kick.
Experimenting with different fruits and even herbs like basil or cilantro can lead to surprisingly delicious results, transforming the familiar mojito into a novel experience.
Step-by-Step Mojito Crafting
Whether classic or with a twist, the method for crafting a mojito remains largely the same, focusing on releasing the flavors of the mint and lime without over-muddling. Here’s a detailed guide:
- Prepare the Glass: In a sturdy highball glass, place 10-12 fresh mint leaves. If making a twisted mojito, add 3-4 slices of your chosen fruit (e.g., strawberries, mango chunks).
- Add Lime and Sugar: Cut one lime into wedges. Squeeze the juice from 2-3 wedges into the glass, then drop the squeezed wedges in. Add 1-2 teaspoons of granulated sugar or 1/2 to 1 ounce of simple syrup (adjust to taste).
- Muddle Gently: Using a muddler, gently press the mint, lime, sugar (and fruit, if applicable) together 3-5 times. The goal is to release the aromatic oils from the mint and juice from the lime and fruit, not to tear the mint leaves into tiny pieces, which can make the drink bitter.
- Add Rum and Ice: Pour 2 ounces (60ml) of white rum into the glass. Fill the glass completely with crushed ice or ice cubes.
- Top with Soda: Top off the glass with club soda or sparkling water.
- Stir and Garnish: Stir gently with a bar spoon to combine the ingredients. Garnish with a fresh mint sprig and an extra lime wedge or a slice of the fruit used in your twist. Serve immediately.
Mojito Garnish & Presentation Tips
Presentation is key for any cocktail, and the mojito’s vibrant green and clear hues make it particularly appealing. A tall, clear highball glass is traditional. For garnishes:
- Mint Sprig: Always give the mint sprig a gentle clap between your hands before placing it in the glass; this releases its aroma.
- Lime Wedge/Wheel: A fresh lime wedge or wheel on the rim adds a professional touch.
- Fruit Slice: If you’ve used a fruit twist, an additional slice of that fruit (e.g., a strawberry, a mango slice) enhances the visual appeal and hints at the flavor profile.
- Colorful Straw: A reusable, colorful straw can add a pop of fun.
Ensure your ice is fresh and your mint is vibrant for the best visual and aromatic impact.

Brewing Your Own Strawberry & Peach Wine
Venturing into homemade fruit wine production is a rewarding journey that culminates in a unique, personalized beverage. While grapes are the traditional base for wine, fruits like strawberries and peaches yield wonderfully aromatic and flavorful wines that are perfect for summer. This process, though requiring patience and attention to detail, is accessible to home enthusiasts. This section will demystify the art of making strawberry and peach wine, guiding you through each critical stage from ingredient selection to bottling.
The Fundamentals of Fruit Winemaking
Winemaking, at its heart, is the controlled fermentation of fruit sugars into alcohol by yeast. For fruit wines, the process is similar to grape winemaking but often requires adjustments for sugar and acid levels, as fruits vary widely. Key principles include:
- Sanitization: Absolutely crucial. All equipment must be meticulously cleaned and sanitized to prevent contamination by unwanted bacteria or wild yeasts, which can spoil the wine.
- Yeast Selection: Specific wine yeasts (e.g., Lalvin EC-1118, K1V-1116) are used to ensure a clean, efficient fermentation and desired flavor profile.
- Sugar Content (Brix/Specific Gravity): Fruits often lack sufficient sugar for high alcohol content, so additional sugar (table sugar, dextrose) is added to reach the desired starting specific gravity (SG), which indicates potential alcohol by volume (ABV).
- Acid Balance: Fruit acidity is vital for flavor, yeast health, and preventing spoilage. Acid blend or lemon juice may be added to achieve optimal pH levels.
- Nutrients: Yeast nutrients (e.g., Fermaid O, DAP) support healthy yeast growth, especially important in fruit musts which can be nutrient-poor.
Understanding these fundamentals lays the groundwork for successful fruit wine production.
Essential Ingredients for Strawberry & Peach Wine
For a 1-gallon batch of strawberry or peach wine, you will typically need:
- Fruit: 3-4 lbs of ripe strawberries or peaches. Ensure they are free from mold or bruising.
- Sugar: 2-3 lbs of granulated sugar. This will be adjusted based on the fruit’s natural sweetness and desired alcohol content.
- Water: 1 gallon of filtered or distilled water.
- Wine Yeast: 1 packet (5g) of a suitable wine yeast (e.g., Lalvin K1V-1116 for fruit wines).
- Yeast Nutrient: 1 teaspoon.
- Pectic Enzyme: 1/2 teaspoon (helps break down fruit pulp and prevent haze).
- Acid Blend: 1 teaspoon (adjust based on taste/pH testing).
- Campden Tablets (optional but recommended): For sanitizing fruit must and preventing oxidation.
Additional items like a primary fermenter (food-grade bucket), secondary fermenter (carboy), airlock, hydrometer, thermometer, and bottling equipment are also essential.
Step-by-Step Home Winemaking Process
This detailed process outlines the key stages for crafting your fruit wine:
- Sanitization: Thoroughly clean and sanitize all equipment that will come into contact with the must (fruit juice/pulp mixture) or wine. This includes fermenters, spoons, hydrometer, etc.
- Fruit Preparation: Wash, hull, and chop strawberries. For peaches, wash, pit, and chop them. You can lightly mash them to release more juice.
- Primary Fermentation (Must Preparation):
- Place the prepared fruit in your sanitized primary fermenter.
- In a separate pot, heat about 1/2 gallon of water to dissolve the sugar. Stir until fully dissolved, then let it cool.
- Add the cooled sugar water to the fruit. Add the remaining cold water to reach the 1-gallon mark.
- Add pectic enzyme, acid blend, and yeast nutrient. Stir well.
- If using, add 1-2 crushed Campden tablets. Stir and cover with a lid (not airtight) for 24 hours to allow the sulfites to dissipate.
- After 24 hours, take a hydrometer reading to determine the starting specific gravity (SG). Aim for an SG of 1.080-1.100 for a medium-dry to sweet wine. Adjust with more sugar if needed.
- Pitching the Yeast: Rehydrate the wine yeast according to package instructions (usually in warm water for 15-20 minutes). Add the rehydrated yeast to the must. Stir gently.
- Primary Fermentation: Secure the lid on the primary fermenter and attach an airlock. Place the fermenter in a cool, dark place (65-75°F / 18-24°C). Fermentation typically starts within 24-48 hours, indicated by bubbling in the airlock. This stage usually lasts 5-7 days.
- Racking to Secondary Fermentation:
- After primary fermentation subsides (bubbling slows significantly, and fruit pulp settles), carefully siphon the wine off the fruit pulp and sediment into a sanitized secondary fermenter (carboy). This process is called “racking.”
- Leave as much sediment behind as possible. Attach an airlock to the secondary fermenter.
- The secondary fermentation allows the wine to clarify and mature. This stage can last 2-4 weeks or even longer.
- Stabilizing & Clarifying (Optional):
- Once fermentation is complete (hydrometer reading remains stable for several days, usually around 0.995-1.005 SG), you can stabilize the wine. Add potassium metabisulfite and potassium sorbate to prevent further fermentation and microbial spoilage.
- If the wine is still hazy, a fining agent (e.g., bentonite, Super-Kleer) can be used to help it clear. Follow product instructions.
- Bottling & Aging:
- Once the wine is clear and stable, siphon it into sanitized wine bottles, leaving about 1 inch of headspace.
- Cork or cap the bottles.
- Age the wine in a cool, dark place. Fruit wines often benefit from aging for at least 3-6 months, allowing flavors to mellow and integrate. Some can be enjoyed sooner, but patience often yields superior results.
Troubleshooting Common Winemaking Issues
Even with careful planning, issues can arise. Here are some common problems and their solutions:
- Stuck Fermentation: If fermentation stops prematurely, check the temperature (too cold or hot?), add more yeast nutrient, or re-pitch a fresh packet of yeast.
- Haze in Wine: Often caused by pectin from fruit. Pectic enzyme added at the beginning helps. Fining agents can clear haze post-fermentation.
- Off-Flavors: Can be due to wild yeast contamination (poor sanitization), oxidation, or inadequate aging. Prevention through strict sanitization and proper airlock use is key.
- Oxidation: Wine tastes stale or like sherry. Minimize air exposure during racking and bottling. Use Campden tablets.
- Too Sweet/Too Dry: Adjust sugar levels at the start. For too sweet, allow more fermentation time. For too dry, backsweeten with a stabilized simple syrup before bottling.
Keeping detailed notes throughout the process can help diagnose and prevent future problems.

Essential Tips for Elevating Your Homemade Beverages
Beyond following recipes, mastering the nuances of ingredient selection, flavor balance, and presentation can transform your homemade summer drinks from good to truly exceptional. These expert tips apply across sangrias, mojitos, and even fruit wines, providing a framework for consistent quality and delightful innovation. Paying attention to these details will ensure that every drink you craft is a testament to your growing expertise and passion for mixology or winemaking.
Sourcing Superior Ingredients
The quality of your final drink is directly proportional to the quality of your initial ingredients. This principle cannot be overstated:
- Freshness is Paramount: Always use the freshest possible fruits, herbs, and citrus. Wilting mint or overripe, bruised fruit will compromise flavor and aroma. Visit local farmers’ markets for seasonal produce.
- Quality Alcohol: For cocktails, a good quality rum, wine, or brandy makes a noticeable difference. You don’t need the most expensive bottle, but avoid the cheapest options. For winemaking, ensure your yeast is fresh and stored correctly.
- Pure Water: Especially crucial for winemaking, but also beneficial for cocktails. Filtered or distilled water prevents unwanted flavors from tap water minerals or chlorine.
- Natural Sweeteners: While granulated sugar is fine, consider natural alternatives like raw honey, agave nectar, or maple syrup for different flavor profiles. Adjust quantities as these are often sweeter.
Investing in quality ingredients is the simplest way to guarantee a superior end product.
Mastering Sweetness & Balance
Achieving the perfect balance of sweet, sour, and bitter notes is an art form. It’s about tasting as you go and understanding how each component interacts:
- Start Conservatively: Always add sweeteners gradually. You can always add more sugar, but you can’t take it out. For cocktails, a simple syrup (1:1 sugar to water) is easier to integrate than granulated sugar.
- Acid is Key: Lime and lemon juice are not just for sourness; they brighten flavors and cut through sweetness, preventing drinks from tasting cloying. Don’t be shy with fresh citrus.
- Aromatic Balance: For drinks like mojitos, the mint provides an aromatic lift. Ensure it’s present but not overpowering. In sangria, the fruit should be harmonious with the wine.
- For Wine: Use a hydrometer to predict alcohol and sweetness levels. If a fruit wine is too acidic, a touch of calcium carbonate can reduce acidity without adding sweetness.
Practice and careful tasting are your best tools for achieving balance.
Creative Flavor Infusions
Don’t limit yourself to the classic combinations. Infusing additional flavors can add depth and complexity:
- Herbal Infusions: Beyond mint, consider basil, rosemary, or thyme in mojito variations or even in sangria. Gently muddle or create simple syrups infused with these herbs.
- Spices: A cinnamon stick in sangria, a few cloves, or a slice of fresh ginger can introduce warming notes. Use sparingly to avoid overpowering the fruit.
- Bitters: A dash of aromatic bitters (Angostura, orange bitters) can add complexity and depth to cocktails, tying flavors together.
- Floral Notes: Elderflower liqueur, rosewater (very sparingly), or hibiscus tea can impart delicate floral aromas to white sangrias or mojitos.